Welcome

LilyPadBioPic-2
Follow on Bloglovin

Followers

1st Layout Published

On-Line Mag.Pub.

Preview

My Staedtler Pub.

Preview

An Amazing Experience

Thanks Jill

Featured on Inspired By
Shining the Light Challenge Award

Photography Tips

Photography Tutorials
2010-2014. Powered by Blogger.

June 29, 2011

Lily Pad Give-Away! Leap To It!

I became a Member of Lily Pad Cards today! Go become a member for a chance to win a collection of Hero Arts stamps. Contest closes at 11:59 p.m. EST on Friday, July 15. 


Come join me for a a nice cool dip in the pond and some much needed sunbathing on your very own pad! You won't want to miss out on the fun!  With challenges galore, announcements from our ever adorable "Freddy" organization and crafting tips, video tutortials, special techniques, and of course prizes, you will be so happy that you took the leap and made Lily Pad your Froggie Friend forever.

Meet you at the Pad!
Dana

June 20, 2011

Haven't Forgotten Father's Day or You!

Hi Everyone:
Just wanted to pop in and say sorry for not posting yesterday like planned. But I am out of commission for a little while. I haven't been feeling well for 2 weeks but kept putting it off to go and see a doctor. Well, with pains in my chest and back on Saturday afternoon and having trouble breathing, I ended up at the After Hours Clinic late Saturday evening. No, I don't have phenomena, but I do have bronchitis. So just taking a break for a couple of days and will be back when I am feeling better. Thanks.

Hugs
Dana

June 19, 2011

Doin' The Moxie While Hangin' At The Cafe & Then Hopping To The Pad! Lol!


That was a great title don't you think! Lol! I tried to get all three to fit in there! Lol. I wanted to share a card with you that will be submitted to three challenges.


First challenge is the challenge over at Moxie Fab World. I so love the colours in this picture and wanted to share those same bright colours in my card.
  
The second challenge is the Sketch Challenge over at Lily Pad. I loved this sketch provided by Lucy Abrams. I love how simple it is and how fast this was to put together.   


The third challenge is the challenge over at The Play Date Cafe. I love the colours here too, and the only difference between the two is the colour yellow, which I did add to my card. I hope it doesn't get me in trouble! Lol.  Here is my card for these three challenges. Hope you like the fun and whimsical feel to this one.
 
This card is also a Father's Day card for my sweetie, but I also have some more to share tomorrow.


Close Up 


Lollipop was drawn using a compass/protractor to make the circles. All colours used in colouring were Tombo Markers. Alphas used were from the Little Boy Collections/Echo Park. Bling is from Dollarama. Ribbon is grosgrain from Wally World, and cardstock is Recollections & Autumn Leaves. Detail was added with black Marvy pen and white gel pen/Tombo. Shine was added to the Lollipop to give it that glassy look and this was done by adding Glossy Accents/Ranger.

This is not normally my style but when I saw the inspiration up above in the provided pictures all I kept seeing in my head was a big old lollipop! Lol. Thanks for popping in to visit. Be sure to check back later today for some more Father's Day Cards.

Hugs & Blessings
Dana

June 18, 2011

Same Stamps 3 Ways .....Cards 2 & 3

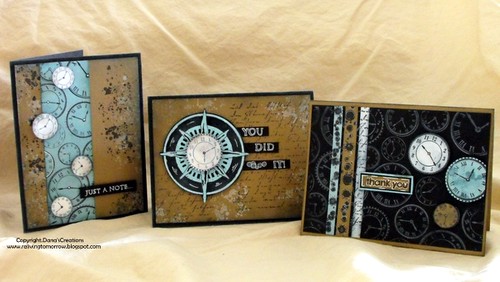
So have you made any special cards for the men in your life this week? Well hopefully the next 2 cards will inspire you to have a crafty time today and to make something amazing for that special someone. I decided to share the remaining 2 cards today, because I have more to share on Sunday.

Card #2.
Thank You

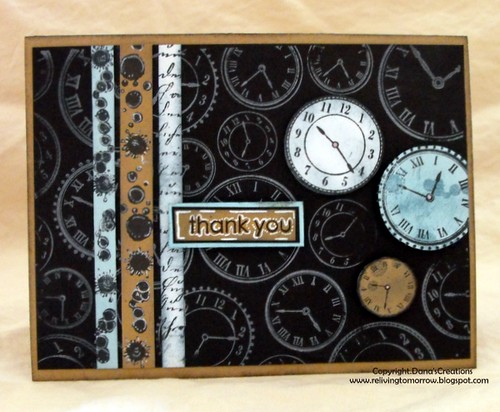
With Whisper White Pigment Ink/Stampin Up' applied to the CG144 Time To Stamp/Hero Arts background stamp, I firmly stamped the image to black cardstock/Bazill.

Then I took that same stamp and stamped the image again on white cardstock/Autumn Leaves, but with Black StazOn ink this time. The same process was repeated twice more but using different coloured cardstock. I used Kraft cardstock, and light teal blue cardstock. Then I cut out 3 clocks in various sizes and adhered with pop-dots to the front of the black card panel.

Next I cut very thin strips of white, light teal blue, and Kraft cardstock. Each strip was then stamped with various stamps from the previous card that was shared yesterday. The lg.teal blue and Kraft strips were stamped with the bigger Paint Splats from the Paint Splat set/Recollections, but the white strip was stamped with script from the S4878 Old Letter Writing/Hero Arts background stamp. The 3 strips were then glued to the front of card panel.

The sentiment was from CL342 Everyday Sayings/Hero Arts and was stamped in black ink on Kraft cardstock. Then layered over top of black and then Lt. teal blue cardstock. This was then adhered to the card.

Once this was all completed it was then placed on a Kraft cardstock card base. Taking my blending tool/Ranger and black ink, I lightly blended ink around the entire outer edge of the card. To add more depth to the card I went back in with white gel pen/Tombo and highlighted the paint splats on the thin strips. I also did some dash strokes and outlined around the sentiment. That's it for this one!

Card #3.
Just A Note.....

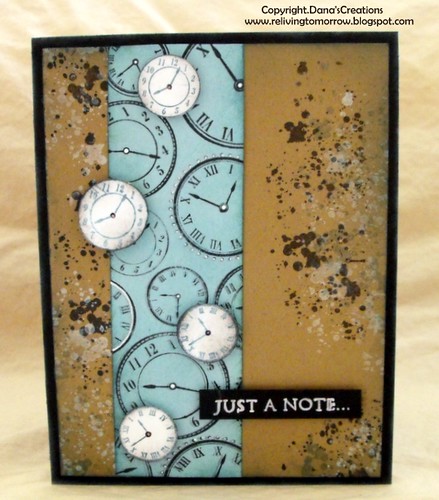
With the larger Paint Splat Stamp/Recollections ( there are several sizes to choose from ) and black ink, I stamped along the sides and slightly off the corners of the Kraft cardstock card panel. Then I repeated the step with whisper white pigment ink/Stampin'Up, making sure to not stamp over top of what I previously stamped, but more off to the side. Hope you know what I mean.

Taking a strip of light teal blue cardstock, I then stamped the CG144 Time To Stamp/Hero Arts over top but in Broken China Distress Ink/Ranger. I then blended black ink and blue ink around the surface to tone down the brightness of the colour. Taking a white gel pen/Tombo, I added white to the center of some of the clocks and to the hands of the clock. This step was completed again on white cardstock to give me the mini white clocks. I blended black ink around those to give them more definition. I tried to alter between the different designs on the stamp to give me different clock faces.

The sentiment from the same Everyday Sayings Set/Hero Arts was stamped in whisper white pigment ink on black Bazill paper. Then I cut it down to to a small strip to adhere to the front of my card panel. This panel was then placed on a black card base and then I lightly added white ink in various places on the outer edges of the card. Voila! Three great cards using the same stamps. Who says that we can't utilize our scrappy resources! Lol.

This was a lot of fun! It helped me to get out of my slump when it came to making cards for the special guys in my life. I trust that your having a great June so far. School let out today and Boy Oh Boy! there is such a feeling of relief here in this house. Lol. Time now to kick back and enjoy the summer! 

Thanks for dropping bye. See you back here on Sunday with more Guy Cards and a little sneek peek of whats coming up next week at Reliving Tomorrow!!!

Blessings
Dana

June 17, 2011

Same Stamps 3 Different Ways!

Seeming that this Sunday will be Fathers' Day, I wanted to share some cards that I made with a masculine style. With cardmaking there sometimes can be challenges. Maybe there might be styles that you do not master very well, or sometimes you have what appears to be more female oriented stamps to use than any other lol!  Well for me I have to really think long and hard when it comes to making cards for the special men/boys in my life. I was determined to take on this challenge and this is what I came up with!  Now I want to share these with you!  So for the next 3 days I will share some cards that will hopefully inspire you to get out your stamping supplies and make some Male Cards for that special man in your life. 
Stamp Used 3 Ways

The first card we will focus on is the " You Did It!" card and share the details.

You Did It!


I started this card using Recollections Kraft paper and the Paint Splat Clear Stamp set/Recollections with whisper white pigment ink/Stampin' Up. I applied this stamped image in various places. Concentrating mostly in the corners and around the bottom portion of the cardfront.

I then took Basic Black Ink/Stampin' Up and a Ranger Blending Tool and blended ink around the edges of the kraft paper. The Old Letter Writing Stamp/Hero Arts was used with black ink to add text to the background.

Next step is to make the Compass! I took light teal blue cardstock and placed the Tim Holtz Compass Mask overtop. The mask has an adhesive on the back so it can stick to any surface, but still be removed later. Then I sprinkled Black Embossing Powder over the entire surface and then shook off the excess. Once this was completed, I slowly removed the mask being careful not to pull up any of the embossing powder. Then I used my heat gun/Marvy to set the embossing powder. The embossed image was then cut out and placed on the card front with pop-dots.

A clock image from the Time To Stamp set/Hero Arts  was then stamped with Broken China Distress Ink/Ranger on white cardstock and placed in the center of the compass embellishment. To add my sentiment to the card, I stamped the sentiment "You Did It!" on mini strips of Black Cardstock/Bazill and stamped paint bubbles to tie it all together.

This was then added to a folded piece of black cardstock which was my card base.  Most card base sizes are usually 4.25" x 5.5" sometimes a little bigger. Such is the one in this post, but there is really no rule saying that you can't change it! Whatever size you want is fine, as long as you can get an envelope to fit the card.  

You can make your own envelopes using tracing templates and cutting them out by hand. Even better, if you have a cutting system like a Cricuit or other cutting machines, you can cut your envelopes that way.

I know that there are some of you who follow and are not card makers. So if of you are wondering "What Masking really is all about?" than Tim Holtz is the person to explain it!  He can explain it so much better than me and does so in his video.

To learn more about Embossing check out my recent video!

This is the completion of my first card from this set. I hope to see you back here tomorrow when I share the next card from this series of "Cards For Men." Until then, take care & sweet dreams.

Hugs & Blessings
Dana

June 13, 2011

Happy Monday!

So how is your week starting off so far? Do you have your chores done, and housework completed? Are you ready to sit and be creative?  I trust that you are all off to a good start to this new week and that it is indeed a Happy Monday!

Well for me I woke up with what I think might be a head cold! Yuck! With my son sick all weekend with what we thought was just allergies, but really was a bad cold, I know have it too. Isn't fun when family members love you so much that they even pass off things you don't want! Lol! I decided that though I could have sat around most of the day wearing my warm fuzzy robe and cuddled up with a blanket, I made myself get dressed instead. Soooo happy that I did, because I made myself do laundry, and complete some other chores. I know that maybe my day doesn't sound so great, but with all that we hear of folks being sick and going through difficult times, I am extremely happy that nothing major is happening here and that we are all fine.  Thank you Lord!  I am extremely excited to share that yesterday I did my first 5K Walk/Run and I am so proud of myself right now! My hubby supported me and we both took part with a group of close to 200 people in my area. So now I am excited to start training for my 10K challenge!  It wasn't so hard as I thought and I felt so great after. So yes, today is really a great day. Most times I guess it is just a matter of having a positive perspective right! It maybe hard to see sometimes when times are tough, but it is there! We just need to find the peace we need on the inside to see & know that the sun shines brighter after the rain! Okay, enough of my ramblings! Lol.

I do want to share a card that I made using my favorite stamps Hero Arts and it was a new one that I just purchased! I love it so much! I have seen some amazing cards made with that stamp in my HA Flicker group and I feel in love! Corny I know but I just had to have it! Lol!

My card will be submitted to the following challenges:

Check out WeeMemories for their current challenge "Anything Goes!"


Check out Hero Arts Monthly Challenge with using watercolours and other themes. Deadline is June 16th, so get your creations uploaded bye that time for your chance to win!

And last, is my friend Virginia's "Stamp Your Hero Heart Out!" I so want that Envelope stamp that she is giving away and hope that I win it. Well, anything would be fine with me, but that one is on my wish list! Lol! Thanks Virginia for your kindness and for the fun challenge!


Virginia's challenge required that we be inspired by some other person's work. My inspiration for a very long time is someone I think is quiet special! Her work is outstanding and the way she works with inks is nothing like I have ever seen! 

 This is my good friend Jill Foster! Everyone must know her for her wonderful blog Inspired By and if you don't please check it out. Her work will blow you away and you may find yourself drooling from time to time. So keep a box of Kleenex close bye! Lol!


Card Recipe
Patterned Paper: Yellow Paper/For The Record/Echo Park
Cardstock: Bazill & White Watercolour paper/Canson (90lbs/185GSM.10sh)
Stamps: Hero Arts Stamps/S4878 Old Letter Writing, K5376 Hydrangea, CL342 Everyday Sayings
Inks: Distress Inks/Ranger/ Vintage Photo, Broken China, Scattered Straw, Stampin'Up/Choc.Chip
Pens & Pencils: White Gel Pen/Tombo, Watorcolour Pencils/Staedtler ( Karat)
Embellishments: Gold Stickles/Ranger & Navy Twine
Adhesives: Easy Runner/3L & Popdots/Dollarama

I trust that the card above might inspire you to get out your scrappy supplies and be creative. Better still why not take that card that you make and actually send it to someone. Even better still why not play along with the Card Chain Challenge over at Lily Pad Blog. The more the merrier and the fun part is that you will receive a card too. I will be back later this afternoon to share my card that I made for this challenge.

Okay, I guess I better get going. My son is home sick today and I have to help him get some homework completed. Thanks so much for dropping bye and hope that you come again.

Hugs & Blessings
Dana

June 9, 2011

Did You See The Size Of That Raccoon! (Edited Version)

Did that make you look?! Lol. Ya, I know! It isn't really funny! Lol. Well, ya it is! Lol. Okay what would you say if I told you that we have huge raccoons in our area! Don't believe me! Well just take a look at this!  So cute hey! Well this cute critter was one of thoes captured and given an injection against rabbies, which is a part of a Disease Control Project here in my part of Canada. No matter how cute they are, lately they have not been so nice to us. With knocking over garbage cans late at night and taking that garbage and destroying it. The mess can be so terrible at times. These fellows can be a pain!! The thing that gets me is that they are so bold and brazen! When you stand there with a broom in your hand to try to shoo them away, they just look at you with this stupid expression on their faces, and just keep on doing what they want! All I know is that I am so happy the ones I have encountered were not this size! Lol. No kidding right! 


Well I don't think that I would want a racoon this size sitting on my couch! Though I am sure that some others have had the experience. This cute little guy on my card is not of this sort, just a sweet spirited critter thinking of a friend.


Now this card was made for 4 challenges, but one doesn't count because I was late uploading it. I wasn't going to do the challange at Cas-ual Fridays because I don't do CAS cards very well. (Clean & Simple for those who don't know what that is!) So 3 hours before the challenge was closed I decided to play along. You see that cute handmade rug there on the floor, well the tassels on that rug was what took me the longest to make. Each tassel was made up of 4 different colours of Bakers' Twine and then I pulled all the threads apart. So when I went to upload I had problems with this laptop and was about 4 or 5 minutes late. I could have kicked myself because I spent way to much time on those tassels. Lesson learned for next time I guess! I used the wonderful sketch below for the design of my card and I loved how it turned out! I actually had it thought out in my head the night before, but didn't get to do it becaue of other commitments. So that is why I waited. I should have just done it sooner than later, but life sometimes tosses us a curve ball and plans change. 


So I missed this one, but they have a new challenge up now and you can check it out here. I don't give up that easily, so I will be playing along with this new one earlier this week.

Close Up Shot!
 Card Recipe
Cardstock: Recollections, Stampin'Up, & Bazzill
Clear Stamps: CL261 Woodland Creations/Hero Arts
Digital Stamps: Claudia And Company - Comfy Couch By - Janes Doodles
Markers & Pencils: White Gel Pen/Tombo, Watercolour Pencils/Staedtler (Karat), Marvy Blk. Pen
Adhesives: Easy Runner/3L & Popdots/Dollarama
Tools: Creative Memories Circles Cutting System
Embellisments: Bakers' Twine/Twinery,

My friend Jane from our Flicker group is the creator of the amazing Digital Image that I used. Just click on her name to find out more about her Digital Stamps and card creations.  Her cards are beautiful and so fun!


This card will be submitted to the challenge over at Wee Memories. I love these kind of challenges because the possiblities are endless! Thanks for the challege.


This card is being submitted to the challenge at Hero Arts for their June Monthly Challenge. One of the challenges was to use watercolours on your card. That is what I used here on the couch and on the raccoon.

And last, my friend Virginia is having a challenge at her blog. The challenge is "Stamp Your Hero Heart Out" and you do have to use one Hero Arts stamp. You are to make a card inspired someone else that you know. Well my card was inspired by Robin in our HA Flicker group. Her cards are amazing and it is just like looking through the window of someones' home. They are so fun and imaginative!  Check out this card! So make sure to check it out and play along. I am praying that I win her second prize because I really want that Envelope Patterned Stamp so bad! Lol.

Hopefully Blogger will be better this upcoming week. I have had my share of issues trying to get this post updated and hopefully my uploads tomorrow will not be the same.

I trust your all doing well and look forward to seeing you back this way again!

Until next time!
Dana

June 8, 2011

New Video Picture Tutorial

Hi Everyone;

After sharing the card that I made with Embossed Vellum Flowers, I had people ask about it and so I decided to do a video. Here it is and I hope you like it. If you have any questions feel free to ask them in the comments section of this post.  Thanks for looking and if you would like to subscribe to my channel at YouTube that would be awesome!


Thanks so much for dropping bye.  I also have some cards to share later today! Hope your having a day filled with sunshine!

Hugs
Dana

June 3, 2011

Hey What's Up?

Hi Everyone:

Just wanted to share a card that I made using a Hero Arts Digital Kit and Hero Arts clear stamps.  There are so many things that you can do with digital images. Increasing images in size is one of the things that I like to mess around with and that is what I did with this card below. I enlarged the size of the helicopter to accommodate the size of the squirrel. So cool!!

Hey What's Up?


Card Recipe
  Stamps: Woodland Creatures/CL261 & Everyday Sayings/CL342 - Hero Arts
Markers & Pencils: Watercolour Pencils/Staedtler(Karat), White gel pen/Tombo, & Blk. Sharpie Marker
Cardstock: Autumn Leaves, Recollections,Bazzil, and Stampin' Up 
Embellishments: Brads/Dollarama, Baker's Twine 
Punches: Circle Punches/Creative Memories
Inks: Basic Black/Stampin' Up

 The stamps used in making this card are as follows;

 
Everyday Sayings


Woodland Creatures

Kiddie Conveyance
Digital Stamps: Hero Arts Kiddie Conveyance Kit/2Peas
Alphabet Stamps: Scrappy Cat Designs
Die-cuts: Star/Close To My Heart Sticker

You may purchase your Hero Arts stamps at Scraptacular Images and preorders are welcomed. To purchase your Hero Arts Digital Kits go to Two Peas In A Bucket. The variety is endless and the girls will be more than happy to help you out!!

Also, wanted to share that Hero Arts is now starting a new monthly challenge. Be sure to check it out and play along for your chance to win $ 50.00 worth of stamping products. For the month of June the theme is Weddings and Congratulations. The technique challenge this month is "Watercoloring".  Look forward to seeing your artwork in the Hero Arts Pool.

Thanks for dropping by and hope your visit was a pleasant one!

Hugs
Dana

Copyright Notice

All the contents of this blog including but not limited to designs, concepts, and photographs are COPYRIGHT 2009-2014 Dana Colbourne. I have put a lot of work in these creations and would appreciate that you use them for inspiration and enjoyment. They are for personal use only and they are not to be copied or used for publications or contest. Thanks for stopping by and supporting me on this fun journey!